Monday, December 5, 2011

PSA: Giving during the Holiday Season

Regardless of your spiritual or religious affiliation or lack thereof, we can all agree on one thing this holiday season: giving is of the utmost importance. We take for granted that we have a roof over our head, clothes on our backs, a job to call our own, and food to eat. We don't even think about the fact that people in our own country are starving, can't shower, and will not be able to read blogs like this because they don't have the internet, not even a computer or any technology to speak of. We should all take a moment and think about the reality of this situation and contemplate how it is we could go about at least putting a smile on someone's face this holiday season, if we can't help them in a more significant way.

More often than not, when we donate, we end up helping the rich become richer through supposed donation organizations where the majority of the funds (roughly 85% of the donations in general) go to the administrative staff that is supposedly 'distributing' the donations. Yeah, mostly distributing it to their own pockets. Let's stop this vicious cycle of feeding the ones who were never lacking in the first place, and donate items of consequence. Go to your local homeless shelter and donate some food, or do the same in your neighborhood grocery store. Maybe even walk up to someone who you see on the street and hand them some food. We constantly focus on severe situations in various other continents, but lest we forget that those close to home are very much in need.

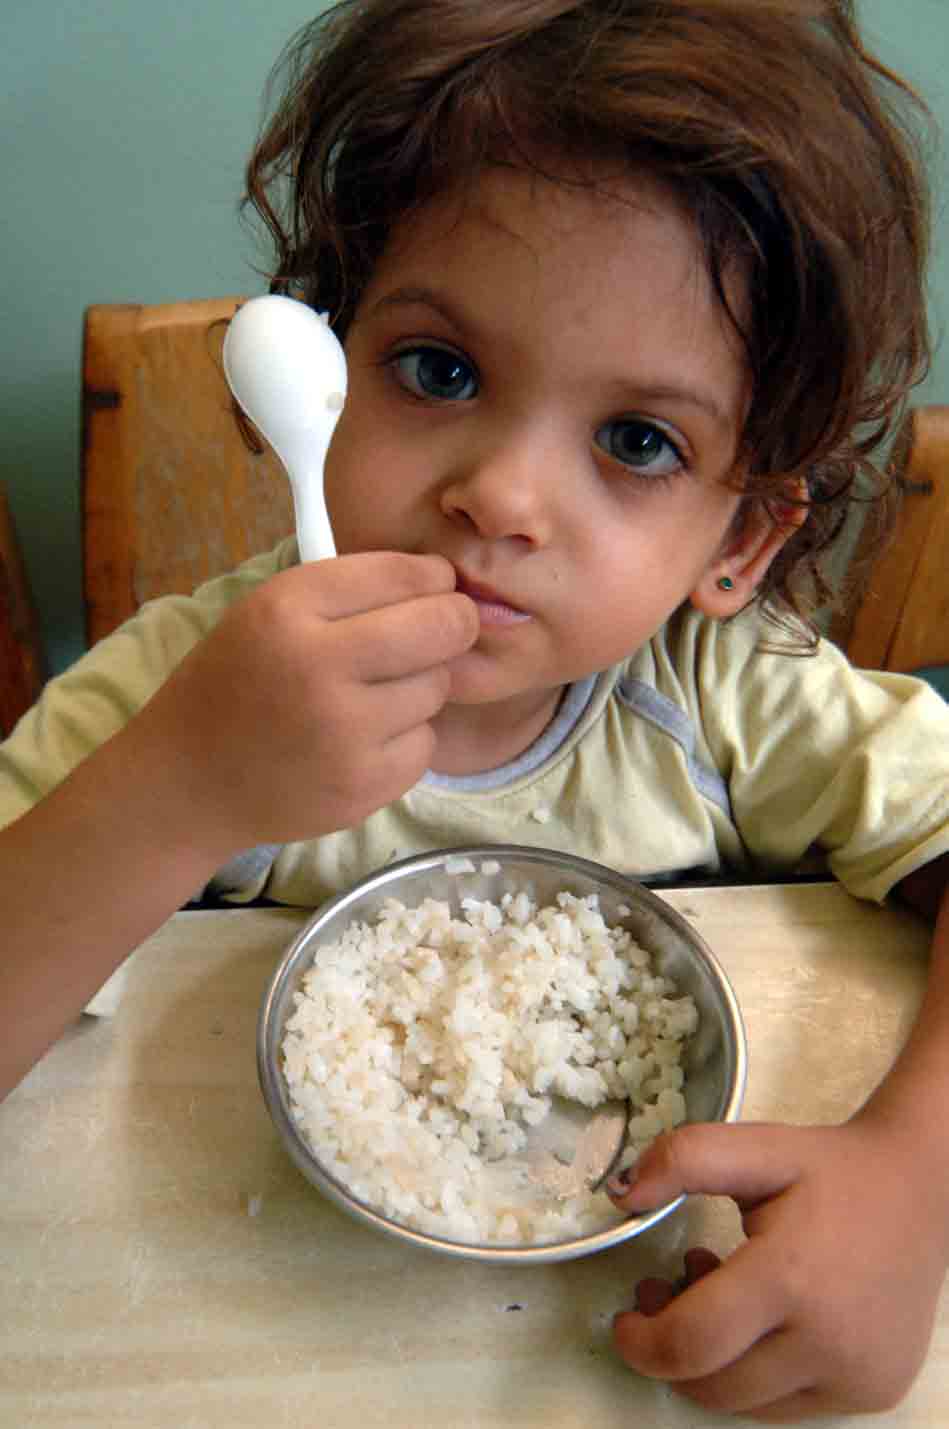
According to Columbia University, nearly 15 million children in the US are living below the poverty level. You may be asking yourself how much that means, it equates to less than $22,050.00 a year for a family of four. That's right, you read that correctly. I can't even fathom how one person could live off of that amount, let alone four. This means that 21% of all children in the United States (a first world country since last I checked) are below the poverty line, when it is estimated that you would need at least double that amount, $45,000.00 a year or more to cover basic expenses (this means shelter, food, water). 42% of all children live in low-income families, this is classified as families of four which make less than what I just told you would be required for basic needs. What is going on with our society? Why aren't we donating our time, efforts, and expendable money to the people who need them.

You may be reserved to give to adults, thinking that they can do better for themselves or they wasted their opportunities, but you can't hold a grudge at children as they are not underprivileged through any fault of their own. Even so, I implore you to reserve your judgments on others. Until you know the truth about each person and their history, you have no right to make any judgments (and even then, it's probably better that you don't). I will tell you all honestly that I am unemployed. I say this not because I want your pity, because I'm not in dire straights, but because it is important to realize the gravity of the situation. I am not unemployable, I have a degree from a prestigious university in Neuroscience, and as you can probably tell already, I am very adept at communication. However, this doesn't change the reality of the situation I'm in. I suppose many people are nowhere near as lucky as I am to have been able to achieve an education and to be surrounded by people who accept me regardless of my personal financial acquisitions. In this economy, it is hard to get a job, even doing something you think is far beneath your skill set, let alone trying to get a job you're not qualified for.

Please give to those who are less fortunate than yourself, especially the children. Rather than splurging on your next trip to the mall or giving ridiculously over-the-top gifts to your friends and family, keep your presents realistic (does anyone really *need* $40 soap from Lush?) and donate to someone who is in need. You will really be making a difference in someone's life and although you may not get personal recognition because donations tend to be anonymous, you will feel fulfilled and warm inside knowing that you have done the greatest service to someone that you ever could: given them the basics for survival.

Let's all work on our inner beauty this holiday season.

Sunday, December 4, 2011

Different concealer colors: What are they for?

Do you find yourself shopping for concealer and looking at a rainbow of colors, wondering what the difference is if you buy a pink, yellow, or green? I had this problem and never knew what they were used for so I limited myself to purchasing the nude shades which literally were the same as my skin tone for fear that I would start to appear clownish with the rest. Fear not, however, because I'm going to tell you exactly what they're all for so don't be afraid to add them to your arsenal of blemish and imperfection coverage.

In general, concealers hide dark circles, scars, pimples, and really any skin flaw you can think of. It's always important to consider whether or not your concealer is of adequate quality and won't cake on your face, as this will make you flaws stand out even more (not exactly your intended result, is it?). Concealer colors are all about neutralization, since most of our skin's imperfections have a color hue to them. For example, your under-eye circles tend to be blueish in hue, many people have redness on their faces, and pimples can be plenty of colors. As for imperfections that aren't affected by color, such as wrinkles and fine lines, we would stick to using the neutral concealer that just matches your skin tone and foundation.

Let's take a look at the color wheel because it holds the key to the mystery that explains what all the various colors of concealers can do for your skin. The theory is that colors on the opposite end of the spectrum (so right across from each other, the way violet is to yellow) cancel out or neutralize each other. Therefore, if you had a yellowish blemish on your face, you would want to use the lavender concealer to neutralize the color before you put on your foundation (foundations generally will not cover up blemishes unless you use a ton, and rather than making your face look like a kabuki mask, you should use concealer). Mint green concealer is used to combat redness such as inflamed pimples and rosacea (redness due to capillaries being too close to the skin). Yellow shades are used to hide nasty veins that may be seen, and the same goes for orange shades which are usually for purple and blue bruises as well. Baby blue or lavender concealers are used to even out your skin, for example if you have bruises or birthmarks that you want to get rid of. The three general concealer colors are yellow, lavender and green. Yellow or apricot warms the skin color and counteracts discoloration on top of its already mentioned uses. Lavender concealer brightens dull skin and can even be used to conceal very dark under eye circles (but not in fair skinned people generally because the dark circles won't be dark enough and can be handled with yellow). Green concealer minimizes redness is general so this color is the most useful for people with red blotches or port wine stains around their mouth as well.

If you have tattoos and you want to cover them up without spending a pretty penny for your tattoo concealers, use the regular drugstore concealers but consider the color of your tattoo. If you have a blue tattoo, use a concealer that is yellowish and make sure that you have a waterproof formula as well as applying a translucent powder on top to set the product for the longest staying power possible.

Below is a collection of concealers that I am familiar with and that have worked well for me at a reasonable cost.

Saturday, December 3, 2011

Changing your beauty routine with age

As time goes on, we realize we no longer look the same as we used to as teenagers and our makeup techniques have vastly improved and changed. The reason for this is to keep your look trendy and fresh but also age appropriate. Any products you use should naturally enhance your beauty rather than try to cover it up and change it to make you look like something you're not.

Under eye care
Aging skin requires that we use products with firming nutrients, but it doesn't mean that you have to be old to use them, I believe that if you use firming products from your twenties, you will look younger in your fifties and sixties. Under your eyes you can see the wrinkles and crows feet that really bother you when you look in the mirror. Packing concealer into here will not do you any good, as the concealer will set inside your wrinkles and make them pit even more. You will want to start by applying moisturizer and anti-aging firming cream under your eye by patting it on with your ring finger (never pushing it in as the skin is thin and will easily be damaged). Then put aloe vera gel or primer in the area where you have bags and wrinkles to seal your wrinkles before applying your concealer.

Color change
As we age, contrasting colors may look too stark and draw attention to our little wrinkles and imperfections. This is why it is a good idea to change your eyeshadow shades from dark/light contrasts to more muted neutrals  and browns, steering clear of blacks and saturated colors. Mature women tend to look best in dark brown mascara as the stark black tends to be too dramatic. Stick to lighter colors of blush, rather than going darker, over time. You want your cheeks to look rosy and young rather than old and gloomy. To avoid getting that smeared look that you can get with cream blush, stick to powder blushes. If you are already adept at using cream blushes, then get a lighter rosy color because at least this formula will hydrate your skin. Rose-toned blush works on all skin types and colors. You may want to consider using mineral makeup because the colors have more of a sheen that will bring light to your face and it has a dewy finish.

Lip-care
We all get small wrinkles all over our lips and that line around our lips, creating an unappealing sad-clown look. Use lip moisturizers/balms constantly to hydrate your lips, especially before you put your lipstick on. Exfoliate to get rid of excess flakes of skin. Line your lips with a lip liner, but do not go a shade that is darker than your lipstick because this is a dated look that is not suited for our modern lives. The purpose of lip liner is so that your lipstick will not run out of the lip line and into your wrinkles, this is a great trick to use.

Here are some inexpensive items you can order online that I recommend if you want to follow the tips in this post!

Friday, December 2, 2011

Snow Bunny Beauty Tips

Are you going skiing or snowboarding this holiday season? Do you just want to be able to look and feel great while wearing layers of clothing, without having to worry about your beauty products rubbing off on the collars of your jackets, insides of your hats, and scarves? This article will tell you how to get the snow bunny look without all the mess (and without all that skiing, I'm more of a hot chocolate by the fire kind of girl myself).

If you're going to be out in the cold, you will definitely want to consider getting a good strong moisturizer for your face and any other skin that is exposed as the cold weather can be very harsh and detrimental for your skin. Use a sweat-proof sunscreen on the body parts you will have exposed to the sun (even in the winter months it will burn you). Make sure you blot away any excess greasiness from the cream and sunscreen with a tissue before you do anything else, this will help the staying power of your makeup.

Then, primer is a girl's best friend during the winter months, so use a colorless gel-like primer or my personal favorite aloe vera gel, and cover your entire face with it. Stay away from cream-based eyeshadows and powders because they will definitely smear onto your clothing, as will anything with an oil base. You can choose whether you want to wear liquid blush or powder blush, but anything you put on must be covered by a translucent powder to set it (this includes your foundation) and reduce the amount of staining it will do to your clothes.

For a frost-inspired eyeshadow look, use colors that have a sheen and are pearly pales, such as white, silver and lilac. These colors look pretty and feminine but still retail that iced-edginess when put on correctly. Apply your lightest color (white) under the base of the eyebrow as your highlight, your mid-tone (lilac) on the eyelid itself and your darkest shade (silver) as the contour surrounding your eyelid.  Line your eyes with a waterproof kohl pencil for the most staying power (or a truly waterproof eye liner if you can find one) and use a brush to smoke out your eyeliner a little for a sultry gaze. To smoke out your kohl liner, use a black shimmer and extend it into a winged line to elongate your eye.

Make sure you blend everything together beautifully. As a final touch add the lightest color to the inner corner of your eyes generously and apply shimmer powder to your cheekbones, above your blush. For an extra-feminine snow bunny look, you can apply some fake lashes to the outer corners of your eyes, they will stay in place if you use Duo Lash Adhesive glue. Use waterproof mascara so that your sweat from snow sports will not make your mascara run. I would opt for a pinkish blush in a doll-like color, but don't go overboard because if your eye makeup is overpowering, we don't want your whole face to be brighter than the sun. For your lips, you will want to exfoliate to smoothen them out and then just apply a simple moisturizing lipgloss with SPF.

Have fun on the slopes or in the chateau drinking what makes you feel warm and fuzzy inside!

A friend's blog worth checking out

Hi guys, I'm writing to tell you about my good friend Raphael's blog that should interest you if you have are health and money-conscious. He write about conspiracies, health, spirituality and everything in between. His lifestyle posts are fascinating, specifically about the fallout of radiation from the Fukushima plant in Japan that has affected us all whether we know it or not. I'm personally very touched by this story because I was a Chernobyl baby (my mom was pregnant with me when it happened) and I have always wondered if the radiation caused any of my own or my mother's health hurdles. Patients were only told to take potassium iodide pills to absorb the radiation that was flowing within their bodies and neutralize it if the amount was minuscule enough. However, these pills only really protect your thyroid by stopping the uptake of radiation into your organ. Salt really has an unnecessary bad rap, our salt is infused with iodide and if you don't have enough, you will have an unhealthy thyroid.

Securing our power plants, and rather steering away from this type of energy altogether and moving into an alternative energy production worldwide, is the only solution that can keep us safe from the impending doom of aging power plants. The power plant workers who lost their lives in Chernobyl (300 of them at least) were only the beginning and now the Fukushima workers may yet see the same unfortunate fate for their heroic efforts. It is important that we are all striving towards reaching a better tomorrow in the present day. There's some food for thought, and please do think about it long and hard before you support the use of toxic energy.

Thank-you, Raphael, for the shout-out on your blog, his article about my blog can be found here. Go check out his blog at www.raphaelprotti.com


Tuesday, November 29, 2011

How to make your own earring organizer!

This project is inspired by my mother-in-law because she's always making funky and weird household things with her own little touch of style to them. If you choose to do this project, I guarantee you that it will be uniquely you and nobody else will have one that looks the same. If you're not down to pay a pretty penny for most of those metal carousel hangars to put your earrings into, you may want to consider making your own earring organizer.

 This is better than placing your earrings in boxes, as you can forget which ones you own (if you have many like I do) and you might have a hard time finding the pair you want in the mornings. Having your earrings out in the open and on a wall, not taking up any space at all in your home, is an ingenius way to go about displaying them.


The tools you will need for this fun and inexpensive project are:

- inexpensive picture frame (from a thrift store or new, it doesn't matter)
- scissors
- fabric large enough to fit behind your frame
- picture hanging kit (if the frame lacks the proper hanging ability)
- sandpaper (hard and soft grade sandpaper)
- paint
- paintbrush or painting sponge
- something to cover the area you're working over so you don't create a mess - like newspapers
- wire mesh or screen of some sort (window screen can be found at hardware stores)
- heavy duty stapler or hot glue gun (gorilla super glue may even do the trick)

The backing of your creation can be as interesting as you want it to be, you can use produce bags, several wires wrapped around each other, fabric in any array of patterns, or even lace! Make sure that your picture frame is free of any nails or anything that can hurt you while manipulating it, remove nails using hardware pliers. You won't be needing the glass associated with the frame, so you can toss that out or use it for something else, or the backing that comes with it. Make sure you lay down some newspaper or rags before continuing on. First you will want to start sanding with a very gritty sandpaper to get any excess paint or spliced wood off your wooden frame and then smooth it out using a soft grit sandpaper. You don't have to do the sanding if you love the way your frame looks to begin with, but if you want to change the color of it, make sure you sand down the old paint first, and paint on a new layer of whatever color you choose.

Turn your frame around and have the back facing you while it is laying flat. Using your hot glue gun or stapler, stretch the mesh and append it taught to the inlaid part of the frame, making sure you're pulling it apart so that it looks straight and doesn't create waves. Cut the excess of the screen off using your scissors after you have secured it on all sides to the frame.

 Then you will want to glue your fabric to the back of your frame, making sure that the pattern is facing away from you and to the face of the frame (it would be a shame to put it on the wrong way, wouldn't it?). Glue one side and then pull it taught after it has dried and get an even spread across the whole frame. Cut off the excess fabric so it doesn't pop out along the sides of the frame. if your frame doesn't have a hanging kit attached, wait for everything to dry and apply it to the back of the frame. Hang your frame on the wall where you want it to be or just prop it up on your desk if you don't want to hang it. And it's as easy as that! Now all you have left is to hang your earrings in a creative way on your frame.


Melting your lipsticks & making your own lip balms

Do you fear that you're turning into a lipstick hoarder? Do you have tons of little lipstick tubes hanging out in your drawers, purses, car and bathroom? Then maybe you will want to consider this interesting idea I have for you: make them into lip-palettes. It's a very simple process that anybody who owns a microwave can do. I imagine that at this point you're basically picturing a Salvador Dali-esque lipstick melting slowly all over the place. I assure you, this is not the case, I have a way you can do this in a very controlled and neat manner. I promise it's all worth it.

There are very logical reasons why you might want to do this: to de-clutter, to see all of your colors at once and make choices more easily, and to get the small remaining amount of lipstick out of the tubes you have mostly used up. The melting method lets you get the most bang for your buck, so you don't go out purchasing another lipstick when you have a decent amount stuck inside your lipstick container that you just can't get at. If you have colors that you absolutely loathe, this is a good time to get creative, you can mix them together and get new and exciting colors! Let's begin.


What you'll need:
- tiny spatula or cuticle pusher
- microwave or a candle (I recommend using tongs if you're considering the latter)
- container to put your melted lipstick in
- lipstick
- rubbing alcohol

First, you will want to take your container of lipstick and use a tiny cuticle pusher/spatula to scrape out the lipstick, you don't have to worry about making a mess or crushing it (I promise we'll reconstitute your lipstick in a manner that is beautiful). Place the lipstick chunks in your new lipstick container. You can choose an empty pillbox, palette, plastic container, glass container, used-up lipbalm case, or stacked dollar-store containers or bead organizers (my personal favorite). Whatever container you choose, make sure to put your lipstick in and dilute it a little bit with a few drops of rubbing alcohol so you can mix it together for an even consistency. Then nuke your lipstick in the microwave. Be careful not to do this for longer than a 5-7 seconds at a time (depending on the strength of your microwave) because your container can crack. Try to work with a material that you know won't crack in the microwave.

If you use a lip brush to apply your lipstick, you will get the most out of your product and you won't be wasting any on your fingers. Also, if you think your containers will melt in the microwave, use a microwaveable tupperware container or bowl and then simply scoop or pour your melted mixture into your container of choice. If you choose to turn your lipsticks into more of a 'lip balm' you will want to mix in some shea butter. How much you add really depends on how much pigment you want in your lipbalm, because the more shea butter you will add, the less color you will see. Make sure to thoroughly mix them together with mixing medium or rubbing alcohol before you melt them. This is a fun and easy project! Enjoy yourselves and show me some of your creations!


Related Posts Plugin for WordPress, Blogger...