This post is for all of you ladies and gents who have unsightly scar tissue that is irking you to no end. I have thoroughly reviewed and tested many products on myself and can tell you from personal experience which products do work as claimed or surprisingly well, and which products are complete duds. Having experienced major surgery that has left significant scarring down my entire abdomen, I have spent literally years trying to find the product that will get rid of pitting scars, raised scars, hypertrophic scars (slightly more mild than keloid scars) and that reduces the reddish pigmentation of said scar. I'm also highly prone to burning myself on a curling iron or in the oven while I'm cooking, so I find it absolutely necessary to have a good product in the house that protects against scars forming and helps them heal. I have not had personal experience with acne scarring but I do know quite a few individuals who have been affected by this problem and, I believe, these same treatments will work for you.
 Product: Marigold (Calendula) Cream
The Theory: For many centuries, various cultures have been using this flower for its medical properties.This cream is derived from a type of marigold flower and is supposed to have anti-inflammatory, antibacterial and anti-viral potency. It is theorized to help heal acne scars, skin diseases and scars all over the body. These flowers are high in flavinoids which are substances which protect against free radicals that cause damage to your cells and kill them.
Actual Results: Actual human testing results only indicate that it may be useful as a preventative ointment to damage against radiation and inflammation and possibly help to heal minor wounds from first degree burns.It is mostly beneficial as a moisturizer to skin soften up if you have dry skin. I have personally used this cream but it did not do anything to my hypertrophic, red scar tissue. I suggest using it in the winter-time to moisturize your skin because it goes on pretty thickly and provides good coverage for unscarred skin, if you can stand the potent smell.
Retail Cost: around $10 and can be found
here
Overall Scar Reducing Rating: 1.5/5
Product: Bio-Oil
 The Theory:
 Bio-Oil is marketed as a mixture of vitamins (A and E) and plant extracts (from calendula, lavender, rosemary and chamomile) with a patented PurCellin Oil ingredient that is supposed to open up your pores and easily inject the beneficial ingredients inside your skin. If applied in a circular motion on the area of scarring twice daily for 3 months, it claims to improve your skin's appearance.
Actual Results: The formula is extremely oily (albeit it does get absorbed faster than actual oil) and apparently does soften stretch marks, but there are no reports about color changes, or actual improvement on larger scars. I used it for months, applying it generously, and did not see improvement in my scar. I'm not sure about its claims to improve skin elasticity either, because there is no ingredient in the formulation that would increase the collagen's elasticity. It has a pleasant smell but it is too fragrant for my tastes, and would probably be very annoying to put on your face for acne scarring. It is also made with many unnecessary chemicals to achieve its fragrance and dyes to achieve that orange coloration.
Retail Cost: approximately $10 and can be found
here
Overall Scar Reducing Rating: 1/5
Product: Contractubex gel
The Theory: This product out of Germany's independent pharmaceutical company, MerzPharma, claims that it can treat stiff scars that impair skin's movement which are old or new. It is believed to exert its positive influence over scars which were caused by physical accidents, operations, acne, or burns (basically any type of scar). The intended usage of this treatment is two to three times a day for as many months as necessary. One of the active ingredients is cepae extract from onions which is anti-inflammatory and kills bacteria, allowing for a healthy reduction in swelling. Another ingredient is heparin which loosens the tissue, causing your scar to soften and helping water bind to hydrate and moisturize the area. Allantoin, the final active ingredient, promotes healing and soothes the area by promoting circulation/blood flow. The claims are that the ingredients will enhance and complement each other's functions and the base of the gel will allow the active components enter the scar, while creating a film over top of the scar that protects it from further damage.
 Actual Results:
 This product was an absolute god-send for me and helped restore my confidence completely. I saw results within a few weeks and was not even diligent about applying it two times a day, I put it on as often as I remembered to. The scar tissue broke down and started to be a lot more elastic, some of my nerve endings regained function because I could feel the skin when I touched it, before I was incapable of feeling anything over the scar because it was so stiff. My raised scar tissue flattened out after months of usage, and the color of my scar faded to the exact color of my skin. I was absolutely delighted with this product, even though at the time I had to order it from Germany and it cost me $100 per bottle. It was worth every penny. Now you can get it much more readily in North America, and I urge you to use it for all your scars, they truly don't lie about the formulation and how the ingredients work. Unfortunately, the only draw-back is that it did not raise the pitted portions of my scar, but these don't bother me nearly as much as the hypertrophic, raised and colored portions of the scar. This cream achieved what skin grafts and plastic surgery don't often achieve for a fraction of the cost and no pain, and for that I am extremely grateful. For those of you who suffer from acne, I suggest giving this cream a try because it will reduce the overall lumpiness of your skin and the coloration, but you will probably need to find a product with collagen in it in order to raise your pitted scars.
Retail Cost: around $30 and can be found on eBay (no longer available on Amazon).
Overall Scar Reducing Rating: 4.5/5
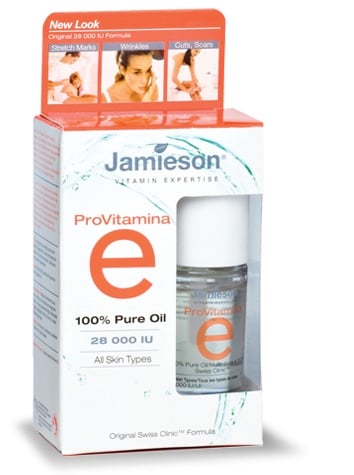
Product: Vitamin E oil
The Theory: For many years, vitamin E oil has been used as a cure-all for skin diseases because it is an antioxidant that reduces the formation of free radicals that stop your skin from healing. Vitamin E is also thought to cause the production of collagen.
 Actual Results:
 There is no proof that vitamin E oil has any protective effects on the skin from upcoming scarring. Also, there is no evidence to suggest that it would improve the way a scar looks or feels, and it has a high chance of causing allergic rashes on the skin. The oil feels very unpleasant on the skin and does not seep into the skin very easily. Vitamin E does have some beneficial properties so it may help in softening the skin and even raising pitted scars, but you first must make sure that you are not allergic to it and that it does not have detrimental effects on your skin. Like all other things, you will not see results quickly, but it may help break up your scar tissue but not necessarily improve the cosmetic appearance of your scar. I personally did not see any improvement in my large scar in appearance, texture, or stiffness from using this product.
Retail Cost: approximately $10 and can be found
here
Overall Scar Reducing Rating: 2/5
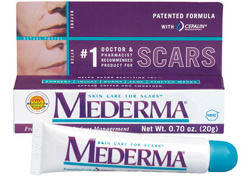
Product: Mederma
The Theory: Made by the same company who makes Contratubex, MerzPharma, Mederma makes a very similar product with a slightly different onion extract, named allium cepa, as the active ingredient as well as allantoin. However, this formulation is missing the active ingredient Contractubex also has, called heparin, and instead contains aloe leaf juice. MerzPharma claims that this topical formulation's gel based on an onion extract is going to make your scars softer, smoother, and improve their appearance.
 Actual Results:
 Overall research shows that this product does not live up to its predecessor, Contractubex, because people have found it to actually be less effective than plain old petroleum jelly. There is no significant change in the appearance or smoothness of hypertrophic scars but it may overall improve the appearance of stretch marks. I was very disappointed in this product personally because I had expected it to be just as great, if not better (since it came out years after Contractubex), than anything I've tried before. Unfortunately, it does not live up to its hype and is very expensive for how little it actually does for your skin. The smell is also very unpleasant because it is a combination of what smells to me like expired onions and perfume over top to mask it.
Retail Cost: around $30 and can be found
here
Overall Scar Reducing Rating: 2/5
Product: Scarguard MD
The Theory: Scarguard MD's claim to fame is from the 5 active ingredients which come from various schools of treatment that work together to reduce your scar's appearance, stiffness, and size. This product uses silicone, which is used by plastic surgeons to get rid of scars, to shrink scar tissue and stop the creation of new scar tissue. Also, this product uses cortisone to reduce inflammation and irritation and allow the healing process to go on. It also has an infusion of vitamin E for softening and moisturizing the skin. The product itself creates a layer over top of your skin of protective film which increases the surface tension and circulation to the scar.This type of covering is waterproof and protects the scar tissue from any external factors that may promote its further scarification. Scarguard is supposed to encourage the body to produce the natural enzyme collagenase which stops the body from continuing to scar in that area.
 Actual Results:
 I recently came across this product after I burned myself and ran to the grocery store for a solution, I picked up this product because of the ingredients inside and found myself pleasantly surprised. After a week or two, my ugly burn almost disappeared, and with me that is very unlikely to happen naturally because I've had a burn in a very similar place on my hand that took a year to look semi-normal again. I have not seriously attempted to use this product on a large scar yet, but it does not change the color of a scar or pitted scars, it merely lowers a raised scar or stops a scar from forming. This company does have a product called Scarlight MD which claims it will lighten any of your darker scars over time. I am happy with this product because it does what it says it's going to do.
Retail Cost: around $30 and can be found
here
Overall Scar Reducing Rating: 4/5
In conclusion, all of these treatments require time and patience, scars are formed slowly but they must also be treated very slowly and in a diligent manner. No matter what you do, you will not see results over night. I don't suggest going to get scar revision surgery from a plastic surgeon unless you know for sure that you will not scar afterwards. If you are prone to developing scars from injuries, the likelihood is high that you will develop scars from any procedure a plastic surgeon can provide you because the majority of our skin's healing properties and elasticity comes from our genetics.The reality of the situation is that you may have to use many products over years to get various different effects on the same scar. You will never find a product that raises a scar, flattens a scar, discolors a scar, and shrinks a scar all in one. You may have to do your research and take a few test runs until you find what works best for your situation. I think I've covered a good amount of options for you and I am not affiliated with any of these companies so I give you my truthful and honest opinion.
Good luck and post if you have any better suggestions for treatments.
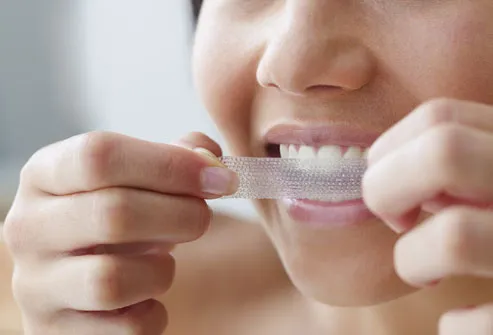 Kits that you can use in your home will work for changing your smile anywhere from three to eleven shades of color. Whether it be in gel form, whitening trays, toothpaste or strips, each of these works in a very similar way and is much less invasive than what your dentist can do with laser teeth whitening procedures (and far less costly). However, like anything else you're using, you have to think about whether or not you should, if there are more pros and cons out of it for you, or you could do some serious harm to your smile.
 A simple solution is tooth whitening paste because it requires very little effort, it's really just about brushing your teeth as you do as always, merely replacing your current toothpaste with whitening toothpaste such as Crest 3D White. The price-point is just right, costing just a little bit more than regular toothpaste (by about a dollar or two), and there is no associated pain or adverse effects. If you have severe discoloration, you won't see much improvement, if any, from these toothpastes, but they have been proven not to affect the health of your enamel, so you don't risk anything from trying it out.