Showing posts with label Naked palette. Show all posts

Tuesday, December 6, 2011

Urban Decay NAKED 2 Palette Review

If you know me, you may know that I am a huge fan of the original Urban Decay Naked palette. Such a huge fan, I've been using it since it first came out and love it so much that I try to use a bare minimum of the colors so I don't run out (I realize it's now back in stock, but it wasn't for a really long time at one point!). So imagine my excitement when there was an announcement on Urban Decay's website about something new arriving to do with the Naked line. I instantly rushed to the conclusion that they were going to have another palette, as did many of my fellow makeup junkies. However, many called up the company and were repeatedly told that it would not be another Naked eyeshadow palette. They were lied to. Behold, the new Naked 2 palette by Urban Decay:


Extras that come with the Naked 2 palette
Let's start with the main differences: The Naked 2 palette comes with a dual-sided brush, one side is a shader and contour brush, while the other side is a regular (but very well made) eyeshadow brush. These brushes are of the highest quality and they are from the Urban Decay Good Karma brush line, consisting of the Crease brush and Eyeshadow brush, I have provided links if you are interested in purchasing them separately. This is a nice touch over the dual-sided liner that you got with the original Naked palette, just because people are likely to purchase both and you don't really want to double-up on liners, especially since almost all of their palettes come with the 24/7 pencil eye liner. You also receive a travel-sized lipgloss from their Lip Junkie line in the color 'Naked', this is a really cute added bonus and fits perfectly in your purse for on-the-go touchups. Online, I received a free sample with the order and it was a mini 24/7 glide-on eye pencil in ElDorado. I'm happy about this eye liner because it's a shade I've never tried and am excited to experiment with! However, you won't be getting this necessarily, you may get other samples or colors if you order the Naked 2 online (Sephora won't be giving out free samples with purchase when it hits stores).

If you're looking for a giant change in this palette, you won't find it. The colors are not astonishingly different, they are in the same line of products for a reason. There is an overall neutral theme, but Urban Decay claims that there are more taupe and greige shades in the new palette. I wouldn't say that this is true, however, because the most prominent color is probably bronze (as 5 of the colors learn more towards bronze). There is most definitely a movement away from the overwhelming bronze overtone of the original Naked palette. I will go over every new color and tell you what the comparison is between the new and old one. Foxy is a new and unique shade and is not duplicated whatsoever. Half Baked, unfortunately, is exactly the same in both palettes (this was kind of a cop-out in my opinion, they could have attempted to make a new color here). Booty Call is very similar to Virgin from Naked 1 but it might be a tad more on the peach side. Chopper is orangey and does not appear to be similar to anything other than a lighter cross between Half Baked and Suspect. Tease is a brand new taupe and is matte, but it would be very similar to Sin (Naked 1) if it was shimmery. Snakebite appears to be a shade in between Half Baked (Naked 1) and Smog (Naked 1). Suspect appears unique like a slightly less glittery version of Sidecar (Naked 1). Verve and Pistol appear to be unique colors, they are lighter and are more along the greige spectrum Urban Decay was looking for. YDK is like a mixture between Sidecar (Naked 1) and Toasted (Naked 1). Busted is really just very similar to Hustle (Naked 1) but slightly more maroon. Blackout is unique because it is a matte black eyeshadow and Creep (Naked 1) was sparkly.

Naked Palette (Original)

Naked Palette 2
 I hope you found this review helpful when considering if you would like to purchase this palette or not. It retails for $50 and it really is a great deal because you're getting 12 full-sized eyeshadows (which normally retail for $17/each from Urban Decay), two eyeshadow brushes (which each retails around $26), a free lip gloss, and a free sample from their website. The deal on this is phenomenal and it would make a great Christmas or Hanukkah present for that special girl in your life. I promise you nobody would be disappointed if they received this as a gift. I am ecstatic, my husband purchased this for me as a birthday gift and I couldn't be any more over the moon. I'm a long-time fan of their original and I love this one too. These shades are really practical and you will use this palette every day because it is so versatile.
Side by side comparison of Naked 2 palette (top) vs. original Naked palette (bottom)


Sunday, November 6, 2011

Easy Eye Transformation

Do you ever wonder how to do a simple and foolproof winged liner that's appropriate for every day and work? Well look no further, in this post we'll discuss the proper order to put on your eyeshadows and how to easily apply your eyeliner! Firstly, you want to prime your eyelid all the way up to your eyebrows and under your eyes. This is because the eyeshadow won't stick properly all day long if you don't have a base for it. I used Benefit's Stay Don't Stray primer because I like the thick consistency of it, but a good substitute is a Mac concealer that fits your skin-tone, or Hard Candy's Nobody's Perfect concealer (available at Walmart for a whopping $6, including 6 shades!).
Rub the concealer in with your brush or fingertip, using your ring finger to apply the least amount of pressure to your eye (this avoids excessive wrinkles, ladies and gents).


This is a neutral look so I used the 
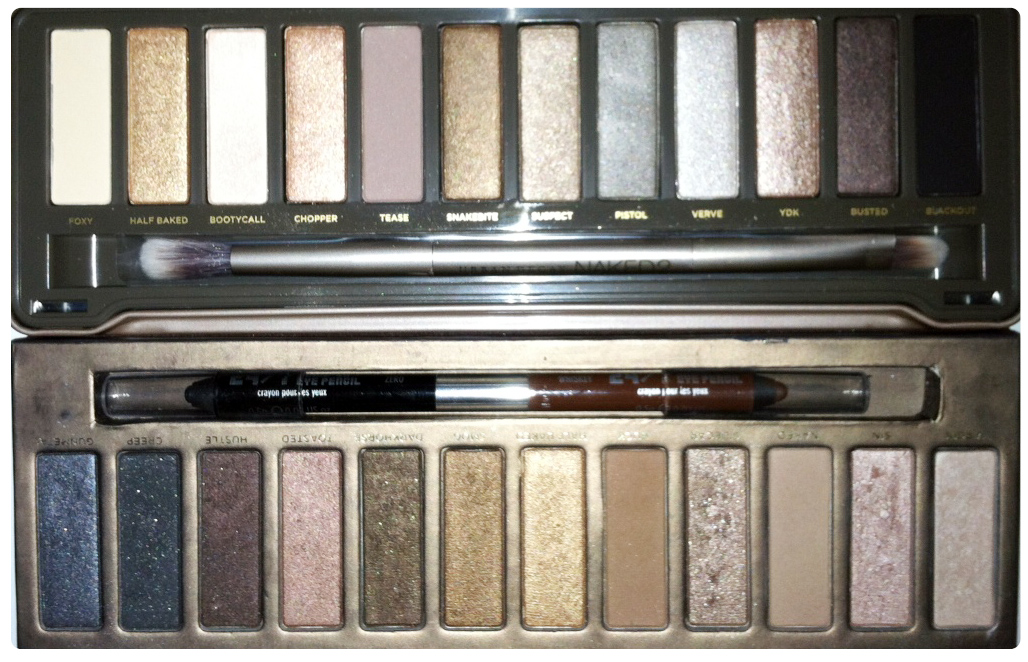
Urban Decay 'Naked palette' and MAC's 'Nylon' eyeshadow. For the base eyeshadow color, 'Naked' is a great option because it is just slightly darker than my skin-tone and shows barely a hint of color. This was applied with a regular eye-shadow brush and the color was packed on. Then, I used the color 'Buck' for the contour, going in a crescent shape around the ball of my eye, and you don't have to be too clean when you apply these colors because they will be blended together at the end. For the highlight, I used 'Nylon' from MAC because it's got a frosty sheen and is visibly lighter than my skin, attracting light underneath the eyebrow and away from any dark-circle. This makes eyes appear bright and refreshed.
Base (Naked), Contour (Buck), and Highlight (Nylon) eyeshadow application
For the winged-eyeliner application, I'm going to advise that if you are not experienced in this, you should use either an angular eyeliner brush or a brush-tipped applicator. I'm going to use the latter because I'm obsessed with Stila's 'Stay All Day Waterproof Liquid Eye Liner' (wow, that name is quite a mouthful). The tip is very fine, but the pen rests very stably   in my hand because, especially if I balance my arm on the table during my application. You should always rest your elbow on a flat, immovable surface when you do your eyeliner because otherwise the line will turn out shaky.
If you don't know where to start and you want to achieve an even winged look that is the same on both of your eyes, use these simple guidelines. The first line I draw is from the outer corner of my eye and points upwards to the end of my eyebrow, you can go as far with this line as you want to, it really depends how dramatic of a look you're going for (the farther, the more wingy it will be). Then, I go back to the inner corner of my eye and begin the contour of the line. Do not attempt to fill in as you're drawing the contour because you will not get as smooth of a finish, you want to get the contour done in one smooth stroke. Connect your contour to wherever you like on the winged edge (I go to halfway of the line that I first drew). Then go back underneath your line and fill in from your eyelashes to the outline of your liner. 

Wing, contour, and fill-in eyeliner application
Now apply your mascara of choice and voila, you have a pretty look that is appropriate for anytime of day or night!


Let me know if there's anything any of my readers would like to see in the future! Hope you had fun reading this post :)
Related Posts Plugin for WordPress, Blogger...