Showing posts with label Urban Decay. Show all posts

Saturday, April 12, 2014

Mariposa - Glinda Eyes of the Day


My eyes of the day were inspired by the butterflies in the Mariposa palette and the ethereal look of the Glinda the Good Witch from the Wizard of Oz (and Urban Decay palette infamy). I'm excited that spring is here and the weather is finally starting to warm up, so bright colors and pastels will be the norm!

Here are the products I used for this look (as always I'll let you know exactly how to achieve this on your own):


I really wanted to do something with purples and pinks, but rather than sticking with just the violet color family, I wanted to incorporate the end of frost on my lower lash line. I did this by creating an icy blue on the inner corner that gently melds into the purple. I kept the eyeliner absolutely minimal because I didn't want it to overpower these beautiful colors, as a bold cat-eye can usually make an overwhelming statement and clash with very multicolored eyeshadow.


Primarily I used the Urban Decay Mariposa Palette, which is not part of their permanent collection, but you can still purchase it on eBay or Amazon. I also used some accent colors from the Glinda eyeshadow palette (these pop out of the palette and are full sized shadows, they are very convenient to work with). I finished the look with some bold colored purple and icy blue eyeliners, which I set with powder foundation for long-lasting wear.


  1. Skimp (from the UD Mariposa Palette) all over the brow-bone up to eyebrows
  2. Limelight (from the UD Mariposa Palette) on the inner 1/3rd of the lid
  3. Money (from the UD Mariposa Palette) on the middle 1/3rd of the lid, blend with Limelight at border
  4. Rockstar (from the UD Mariposa Palette) on the outer 1/3rd of the lid, blend with Money at border and apply all over crease generously, making sure the color is as deep as you want it
  5. Infamous (from the UD Mariposa Palette) used to blend out top border of Rockstar into the brow-bone
  6. Apply a creamy black eyeliner to the upper lash line (I used Sumita Beauty's Kala Black Color Intense Pencil)
  7. Line the outer 2/3rds of the lower waterline and lash line with a deep purple (I used Urban Decay's 24/7 Glide-On Eye Pencil in Ransom)
    1. "Set" this eyeliner with Rockstar, same eyeshadow used in step 4 above
  8. Line the inner 1/3rd of the lower waterline and lash line with an icy blue (I used Rimmel Scandaleyes Waterproof Kohl Kajal 008 Light Blue)
    1. "Set" this eyeliner with a light blue eyeshadow (I used the blue half of the shade Aura from the UD Glinda Palette)
  9. Feather out any parts of the makeup that are too harsh, for me this was the inner corner transition, so I went in with a very light peach to fade the pink eyeshadow I used into my browbone color (UD Glinda Palette "Illusion")
  10. To finish off the look, I used the black mascara Jordana Best Lash Extreme!
Hope you have a wonderful weekend!

Tuesday, April 1, 2014

Lorac Pro Palette - Eyes of the Day

The Lorac Pro Palette has long been a cult favorite and beauty bloggers/vloggers rave about it day in and out. This is for good reason, the palette features 16 different shades in 2 finishes - half of the shades are a shimmery pearl finish and the rest are matte finish. You can get so many different neutral looks from this palette, it's definitely a no-brainer for a working girl on the go.

Here's a look at what I used to achieve this mauve-garnet eye look. I tend to be inspired more by the darker colors of the palette which remind me of autumn leaves (they're not so offensively dark that they can't be worn during the day).


  • Eyelids primed with 70 Barely Branded Maybelline Color Tattoo (part of permanent Metal collection)
  • Browbone highlight is the matte Cream shade
  • Mauve applied all over crease in sweeping motion
  • Deep Purple applied all over lid
  • Inner corner accentuated with Gold to draw the light in and make eye appear bigger
  • Middle 1/3rd of the eyelid warmed up with Garnet and blended out


  • liquid eyeliner applied to moving part of the eyelid and flicked out into a small wing - Kat Von D saint eye liner in Trooper
  • Inner 1/3rd of waterline highlighted with Chella Ivory Lace Highlighter
  • Urban Decay 24/7 Eye Pencil in Empire used on outer 2/3rd's of waterline
  • Eyebrows filled in with elf Eyebrow Kit in medium
  • Mascara applied: Tarte Lights Camera Flashes


Saturday, March 29, 2014

Urban Decay Electric Palette Eyes of The Day

Since the latest craze is the Urban Decay Electric pressed pigment palette (which is now available for purchase), I love that everyone's getting into springtime pops of color! I decided to use it for my look of the day, which is a green/blue mermaid-like combination.

Here's a quick guide of the colors I used to achieve this look from the Urban Decay Electric Palette:
I started by working from the inner corner out on my eyelid. In the inner corner, I placed Revolt and patted that on gently to get a saturated color. I find that this palette works best in patting motions and gentle blending rather than swiping back and forth to get a concentrated pop of color where you want it. I then went in with Thrash on the middle third of the eyelid. I put Gonzo on the outer 2/3rd's of the lid, layering it over Thrash for a nice transition color. I used Freak and blended the colors up into my crease, making sure to go in with a clean brush to clean the top of the shade up to the browbone. Then I used Slowburn at the very top edge of my crease where I placed Freak and I made sure to blend it out so that it looks close to my skintone for a very natural warmth to the look.
On the lower lash line, I simply used Freak to line the outer 2/3rd's of the eye and carried Revolt to the inner corner of my eye.  For mascara, I used Benefit's They're Real and to line my eyes, I used Stila's sparkle waterproof liquid eye liner in Starry. The colors ended up overwhelming my eyes and they were starting to get lost in all of the color, so I decided to place some half-lashes to finish up the look (I think this makes my eyes look bigger, especially since it draws out the outer corners).

If you haven't seen my review of this palette complete with swatches, make sure to check that out if you're interested in purchasing it (since it is quite pricey at $49 for this medium-sized palette). You may, or you may not know, that there is a disclaimer/warning on the palette which states that the colors Slowburn, Savage, Jilted and Urban are not FDA approved for immediate eye usage. I interpret this as meaning that you probably shouldn't be using them on your eyelid if you have sensitive eyes but you could use them in your crease and upwards. I wouldn't recommend putting these colors on your waterline but I have used them on my eyelid and I didn't have any adverse reaction.

Friday, February 14, 2014

Urban Decay Electric Palette Sneak Peek and Swatches


I managed to get my hands on the new up-coming Urban Decay Electric palette and I wanted to take swatches for everyone to see. My palette isn't complete and didn't come with a brush but I do know it's going to be a dual-ended brush with purple bristles - one end will be for the inner corner/lining and the other will be for packing color onto the lids. I don't know the release date of this palette but I have read on forums that it's slotted for spring/summer 2014 - I guess we'll have to wait and see!

Urban Decay has for many years been one of my favorite makeup brands and the quality of these shadows is up to par with their regular, fantastic formulation. There's a wide range of colors including silver, blues, greens (even a chartreuse!), orange, pinks and purples. For those of you who are makeup lovers, at first glance this palette may be overwhelming in terms of how saturated the colors are, but I think you could wear these on a daily basis, especially when used sparingly to warm up the crease or along your waterline.


Urban Decay Electric Palette - indoor lighting
The colors vary and are in a range of textures/finishes, there are definitely some which tilt more towards matte texture (Savage) and others which are packed with sparkles (Revolt) but for the most part, there is tiny microglitter when you look at the pans. All of the colors are very soft and buttery and easy to load up onto your brush.

Urban Decay Electric Palette - natural lighting
I'm not sure if these colors are new to their line-up or if they are re-releasing some of the vintage or redux colors, so I really can't comment on that - some of them do look very familiar from their previous Book of Shadows.
Here are the swatches (no primer used):

Urban Decay Electric Palette - Top Row Swatches - natural lighting
Revolt is a silver jam packed full of glitter chunks, I love this color in the inner corner of the eye. Gonzo is a bright baby blue which appears to have microglitter in the pan but when swatched it really doesn't appear as much. Slowburn is a medium orange with microglitter. Savage is a mostly-matte Barbie pink. Fringe is a pearl finish teal that swatches between blue and forest green.
Urban Decay Electric Palette - Bottom Row Swatches - natural lighting
Chaos is a cerulean blue with microglitter. Jilted is a shimmery duo-chrome fushcia which reflects ever so slightly purple. Urban is a classic Urban Decay purple which reminds me of Underland from their LE Alice in Wonderland palette. Freak is a beautiful vibrant mint green and Thrash is a Chartreuse (in between a green and a cooler yellow).

All in all, I'm so excited about this palette because I feel like it's a nice return to the company's roots of out-of-the-box color and individuality. While I love the Naked palettes and own all of them (even the Basics collection), so many companies have started following that trend and Urban Decay is making a smart move bringing color back!

UPDATE: Caution, the colors Slowburn, Savage, Jilted and Urban are not indicated for use on the sensitive eye areas. I think the packaging of this palette says that because they probably use a red dye that is not FDA approved for cosmetics. I have personally used these on my eyes and it was fine, but I don't have sensitive skin or eyes, so please be cautious if you do!

Tuesday, November 5, 2013

Product Review: Sephora Superstars Limited Edition Gift Set


Hi everybody,


I wanted to bring you all a review about my new favorite purchase and product available on the market right now. It retails for $75 but the value of the products in this set is exactly $296.11 (you can see the calculations below) if purchased separately.

This is a 13 product set, of which 9 products are full sized and the others are very generous deluxe samples. These products are the best sellers of 2013 at Sephora, so you know they've got to be great.

So I took pictures of what all the products look like out of the box and I'll go through the efficacy of each one of them.


The packaging is absolutely delightful, when you pull off the laser-cut top-sheet, the inside box is a beautiful rose gold. As you can tell the produts range from lipstick to nailpolish to hair and perfume, this is a kit that basically gives you everything you need for a daily makeup routine (and even has 2 skincare products included).

The nail polish included in this set is Deborah Lippmann Nail Lacquer-Cleopatra In New York which is an absolute onyx black with gold hexagonal sparkles in various sizes that remind me of New Year's Eve. It is absolutely fantastic and the nail polish looks in real life exactly the way it looks in the advertisement below. This product if bought on its own retails for $19!!

\


NARS actually has 2 of their products that made it into the favorites this year, and I was extremely excited because I've only ever owned 1 blush from NARS since they are so expensive I can never really justify purchasing their products! Both of these products are full sized. One is a Blush and Bronzer Duo in "Orgasm" and "Laguna" (their most popular shades) and the other is NARS Sheer Lipstick, Dolce Vita in the most wearable and universal shade "Dolce Vita" which looks great on all skin tones and anytime of day. The Blush duo retails for $41 and the lipstick goes for $26.


This set includes a rollerball of Viktor & Rolf's extremely popular floral scent Flowerbomb . I've always wanted to try this perfume and it was always too expensive, with even the rollerball selling for $29. I'm happy to report that I would purchase the full size, it's smells of oriental flowers (my absolute favorite), roses, freesia's and orchids! This is definitely a luxurious and delightful present to receive in this box.


Another product I was EXTREMELY excited to try out is the Too Faced lash system "Better Than False Lashes". This is actually two products, one is the "Nylon Lash Extension System" which applies nylon fibers to your eyelashes to add volume and length, and the other is the mascara itself which is used to wet your lashes before applying the nylon fiber and then for one final coat to color them black at the end. I'm happy to report that this is, in fact, a miraculous mascara. It makes my lashes look at least 3x fuller and longer than they really are. My lashes actually touch the backs of my eyelids when I wear this! Too Faced Better Than False Lashes Mascara retails for $35 if purchased outside of this set.


The Bumble and Bumble Surf Spray is probably the item I was least excited about so I'm not too upset that this is a travel size rather than a full sized product. 1.7 Fl. Oz are included of this product and this retails for $17.91. This is a good beach spray, if you want to style your hair in beachy waves. It's actually even useful to add volume and distress up your hair a little bit if you want to create a messy bun.

I definitely recommend trying this out in the Superstars collection, I personally would never pay full price for this item because I don't think it's necessarily better than other $8-$12 surf sprays. I was happy that I did get to try it out in the set and I probably never would have if it wasn't included. I also can't think of a different hair product I would be happier to see inside this set, either, so it's still a win-win.


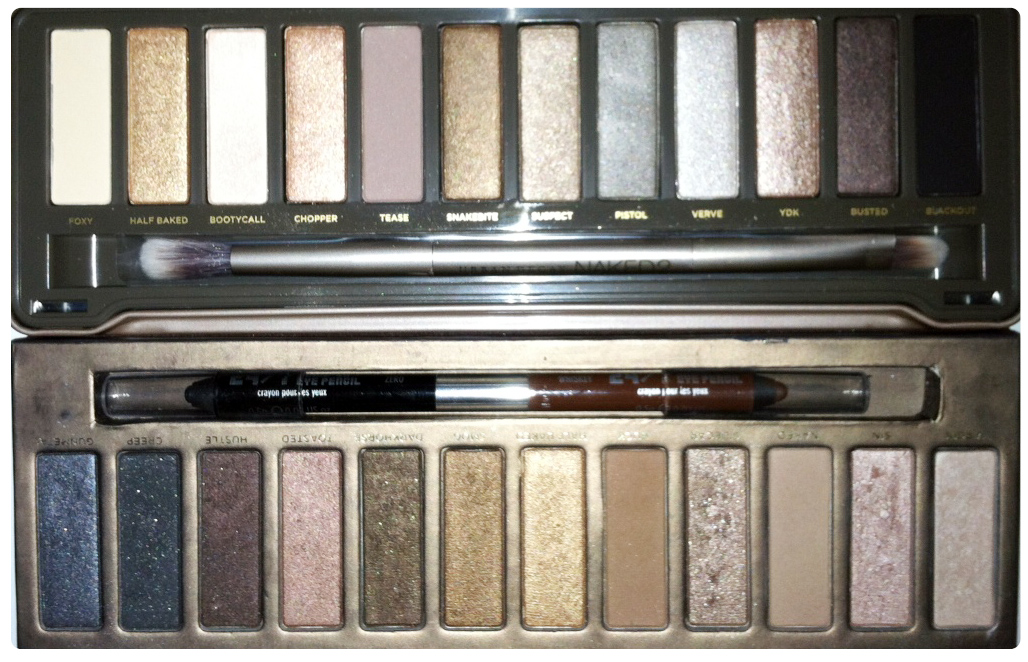
I'm a huge fan of Urban Decay, I own most of their palettes and I can never get enough of their buttery, blendable eyeshadows. Eyeshadows are the one must-have product from Urban Decay, the rest is good too but their eyeshadows are exceptional. The colors "Sin" and "Mushroom" are included in this set, they are a two-in-one eyeshadow. This is limited edition and, as far as I know, only available in this limited edition set. Full sized UD eyeshadows retail for $18 (but these are just in one color). I think it's really great that they give you two universal colors that are for ideal for a perfect neutral look.


Another product I hadn't had the pleasure of trying is Smashbox's Camera Ready BB Cream and it was also included in the set! Now, the only caveat here is that this only comes in the shade "Light" in the set so it will not work for all skin types. However, it is super-blendable, I'm usually a beige or nude tone and it seems a little closer to those shades that a true porcelain or "light". This is the full sized product and retails for a whopping $39. I think it's safe to say that I never would have tried this product out if it wasn't in this set, it costs a pretty penny. However, I really do appreciate it, it's very full coverage and blendable, it really moisturizes your skin as well.

The next two products are both staples in my beauty routine. One is Anastasia Brow Gel, Clear (0.085 oz)  (travel size, $5 value) and the other is stila Stay All Day Waterproof Liquid Eye Liner ($20 value). If you've read this blog before, chances are that you know my absolute favorite daily eyeliner is the felt-tip pen one by Stila, this is a great way to test it out for a fraction of its cost. The brow gel is extremely useful for taming eyebrow hairs. 


Josie Maran Argan 100% Pure Argan Oil 0.5 oz has always been a beauty blogger favorite and is used for hydrating skin, cuticles, and dry hair. The retail value of the travel sized product is $15.20 and will last for months of usage, seeing as the applicator is an eye dropper so you can use this product in a very targeted way.


To finish off the set, last and maybe the best is the Origins GinZing Refreshing Eye Cream 0.5 oz to brighten and depuff (retail value $31). This is a small container that packs a big punch, it's packed to the brim, smooth and supple like whipped souffle batter, and smells of orchids and crushed pearls. I love this stuff, I've been using it nightly and I wake up with soft and rested eyes.

Tuesday, December 6, 2011

Urban Decay NAKED 2 Palette Review

If you know me, you may know that I am a huge fan of the original Urban Decay Naked palette. Such a huge fan, I've been using it since it first came out and love it so much that I try to use a bare minimum of the colors so I don't run out (I realize it's now back in stock, but it wasn't for a really long time at one point!). So imagine my excitement when there was an announcement on Urban Decay's website about something new arriving to do with the Naked line. I instantly rushed to the conclusion that they were going to have another palette, as did many of my fellow makeup junkies. However, many called up the company and were repeatedly told that it would not be another Naked eyeshadow palette. They were lied to. Behold, the new Naked 2 palette by Urban Decay:


Extras that come with the Naked 2 palette
Let's start with the main differences: The Naked 2 palette comes with a dual-sided brush, one side is a shader and contour brush, while the other side is a regular (but very well made) eyeshadow brush. These brushes are of the highest quality and they are from the Urban Decay Good Karma brush line, consisting of the Crease brush and Eyeshadow brush, I have provided links if you are interested in purchasing them separately. This is a nice touch over the dual-sided liner that you got with the original Naked palette, just because people are likely to purchase both and you don't really want to double-up on liners, especially since almost all of their palettes come with the 24/7 pencil eye liner. You also receive a travel-sized lipgloss from their Lip Junkie line in the color 'Naked', this is a really cute added bonus and fits perfectly in your purse for on-the-go touchups. Online, I received a free sample with the order and it was a mini 24/7 glide-on eye pencil in ElDorado. I'm happy about this eye liner because it's a shade I've never tried and am excited to experiment with! However, you won't be getting this necessarily, you may get other samples or colors if you order the Naked 2 online (Sephora won't be giving out free samples with purchase when it hits stores).

If you're looking for a giant change in this palette, you won't find it. The colors are not astonishingly different, they are in the same line of products for a reason. There is an overall neutral theme, but Urban Decay claims that there are more taupe and greige shades in the new palette. I wouldn't say that this is true, however, because the most prominent color is probably bronze (as 5 of the colors learn more towards bronze). There is most definitely a movement away from the overwhelming bronze overtone of the original Naked palette. I will go over every new color and tell you what the comparison is between the new and old one. Foxy is a new and unique shade and is not duplicated whatsoever. Half Baked, unfortunately, is exactly the same in both palettes (this was kind of a cop-out in my opinion, they could have attempted to make a new color here). Booty Call is very similar to Virgin from Naked 1 but it might be a tad more on the peach side. Chopper is orangey and does not appear to be similar to anything other than a lighter cross between Half Baked and Suspect. Tease is a brand new taupe and is matte, but it would be very similar to Sin (Naked 1) if it was shimmery. Snakebite appears to be a shade in between Half Baked (Naked 1) and Smog (Naked 1). Suspect appears unique like a slightly less glittery version of Sidecar (Naked 1). Verve and Pistol appear to be unique colors, they are lighter and are more along the greige spectrum Urban Decay was looking for. YDK is like a mixture between Sidecar (Naked 1) and Toasted (Naked 1). Busted is really just very similar to Hustle (Naked 1) but slightly more maroon. Blackout is unique because it is a matte black eyeshadow and Creep (Naked 1) was sparkly.

Naked Palette (Original)

Naked Palette 2
 I hope you found this review helpful when considering if you would like to purchase this palette or not. It retails for $50 and it really is a great deal because you're getting 12 full-sized eyeshadows (which normally retail for $17/each from Urban Decay), two eyeshadow brushes (which each retails around $26), a free lip gloss, and a free sample from their website. The deal on this is phenomenal and it would make a great Christmas or Hanukkah present for that special girl in your life. I promise you nobody would be disappointed if they received this as a gift. I am ecstatic, my husband purchased this for me as a birthday gift and I couldn't be any more over the moon. I'm a long-time fan of their original and I love this one too. These shades are really practical and you will use this palette every day because it is so versatile.
Side by side comparison of Naked 2 palette (top) vs. original Naked palette (bottom)


Tuesday, November 15, 2011

Z Palette: to buy or not to buy?

I wrote last week that I had ordered my very first Z palette to house all of my old depotted eyeshadows from various brands that don't fit into a regular-sized palette (which usually holds 16mm eyeshadows). So I decided to embark on this little journey to make my own customized palette of random blushes and eyeshadows that I had laying around. When you are finished, your collection will look like this (but less beat-up than mine because some of my products are really used up and abused):


What you'll need for this project:
  • depotted eyeshadows/blushes (if you don't know how to do this, check back to my depotting entry where I tell you how to)
  • labels
  • adhesive magnets (from an art store or department store)
  • scissors
  • Z palette or any magnetic palette that's empty and fits any size pans
  • rubbing alcohol
  • scrubbing sponge


Firstly, you will want to dab a scrubbing sponge into rubbing alcohol and make sure you take the excess glue off of the back of your depotted eyeshadow pan. This will make the whole process a lot less messy and keep your palette looking clean. Take your depotted eyeshadows/blushes and cut a label to write the name of the product, the company that made it and the color for your reference. Unstick the adhesive peel from the magnet and place it on the back of your eyeshadow so that you have reference if you run out of a certain color you love and need to go back and get some more. If you really don't care what the color or product is then just skip this step.
Tools you will need

Then you can cut out a magnet that measures the size of your pan, so place the pan on top of the adhesive magnet and stick it on. Cut around the pan with your scissors or an exacto knife so that you have a perfectly sized magnet. This magnet goes on top of the label to make sure your eyeshadow is securely in the pan. Some pans are magnetized and do not need to have magnets placed on their backs. It is easy to remove the magnetic adhesive strip by hand so if you need name-reference, you can simply do that and re-apply it. If you choose to put your label on the outermost side and sandwich the magnet between the label and the pan, you may not have as good of a grip and your shadows may move.

You can make a separate little paper sheet insert that you can stick to the window of the palette that acts as a guide to your colors. I chose not to do this because I don't use these colors extremely often and will certainly not re-purchase these brands when I can get my hands on MAC and Urban Decay shadows. I have NYX, L'Oreal, Maybelline, Estee Lauder, Lancome, Trish McEvoy, and Clinique products in my Z palette. Most of my stuff is from random gifts with purchases and drug-store buys when I was first starting out with makeup.

My first Z palette!
The last step is simply organizing your pans and popping them in the Z palette however you'd like! I like the concept of the Z palette because you can see everything you have inside, but the problem is that I thought they would be bigger. It turns out the Z palette PRO ($28) and the Z palette regular ($20) palettes only differ by half an inch in width and a very minuscule amount in depth. The depth is important to me so I opted for the PRO palette because I'm putting blushes and mineralized shadows in my next one. But if you're only going to put small eyeshadows, I suggest going for the regular one, as it is $8 cheaper. You can purchase them on Amazon, which is what I did and they arrive in approximately 3 business days. I like the fact that I can now stack all of my eyeshadows and blushes with my other palettes rather than investing in tons of those little Rubbermaid drawers to put them in. When you put things away like this, you risk not seeing all your products for long periods of time and purchasing items even though you already have some at home (but you don't remember because you haven't seen them in awhile). I don't like rifling through my single eyeshadows for a particular color I'm looking for, so this is going to make my morning makeup routine a lot simpler. I suggest buying these if you're a big fan of makeup and have an enormous collection like I do. I'm thrilled with the way I can see all of my colors so I know what to reach for! I give them a 9/10, only because I want more and I think they can be even bigger to fit larger products!

Monday, November 14, 2011

Sephora Mini-Haul and Product Reviews

Lately, I find myself drawn to a particular texture of makeup rather than one brand or another: silky. Silky means that if you rub the makeup mixture in between your fingers, you feel as though your fingers are coated in the finest layer of silk with no bulges, imperfections, or obtrusions. I think powders with this texture will give the most airbrushed makeup look that you can achieve without actually using an airbrush (or even better than an airbrush, depending on which one you have). I used the VIBDREAM sale at Sephora for the holiday season (20% off all items purchased for Nov. 11-14th) for Very Important Beauty Insiders (people who have spent $350+ in a calendar year at Sephora). I was part of this program because my husband bought me the TEMPTU airbrush system as a wedding present, although we ended up returning it multiple times because of all the defects it had, but that's a story for another time.
I bought myself a tried, tested and true favorite: Diorskin Shimmer Powder by Dior, and then I decided to replenish my depleting quantity of Urban Decay's Grifter, feeling adventurous I purchased Kat Von D's Saint palette and the elusive Korres' Wild Rose Compact Powder (because Sephora is usually out of these). I'll be posting photos of all the products and swatches, as well as my impressions of all of them.

Diorskin Shimmer Powder
The original retail value of this shimmer block is $44, which is quite a hefty price, but it was definitely worth it with my discount. I personally buy the Rose Diamond set because of my skin's undertones, since it comes in either pinkish hues or beige/tan hues. Photos do not do this product justice, it is extremely stunning and flattering. This is one of those products that you can wear every day, even though it is shimmer, without looking like you belong in a nightclub. When applied to the cheeks as blush and above for a highlighting effect, it allows your cheekbones to stand out and people will wonder how you're so naturally beautiful. The sign of a great face product is that it looks natural when you put it on, and this is exactly that. The texture is soft and the color payoff is amazing, the colors are not too bright, like some of the Tarina Tarantino or MAC colors tend to be, it is the right amount of color and there is no fall-out or waste. The product is a generous size and there are four shades of color to choose from. There is a highlight white tone, a ballet-pink shimmer, a mauve-rose blush and a fuschia pink blush. However, the fact that you can mix them all together in whichever way you want allows for uniqueness and creativity on your part. I highly recommend this product, it's one of those that get 100% from me.

Urban Decay Grifter Eyeshadow
This is one of my favorite eyeshadows. You have to realize the gravity of that statement when I say this about an eyeshadow that is not from MAC. Urban Decay's color payoff in this shade is brilliant, you get exactly what you see, you can wash the color out a little bit by applying it with a light hand or you can increase its potency by using a mixing medium or Visine when you apply it. Regardless, this is a product that looks great on fair skinned girls with brown eyes. It's got a quite a bit of pizzazz, some may not be comfortable wearing it at work because of the glitter inside of it. The glitter speckles can be quite large and if you have sensitive eyes, then I do not recommend this eyeshadow. I'm lucky enough to be able to wear it and I love it. This product isn't quite as silky smooth as the others I bought this haul, but it's not bad either. It's a good product for a good price ($17 retail) that you will get a ton of usage out of (I get hundreds and hundreds of applications from one of these pots). Just because it might not be for everyone and it's not from the best company ever made, I'm giving this product an 85%, but I would definitely recommend this to you.

Kat Von D True Romance Eyeshadow Palette in Saint
Not particularly liking Kat Von D's style in general, I was reluctant to purchase her makeup and that's why I've waited until I completed my thorough research and asked as many opinions as I could about her products. Can I just say that I was blown away by the quality of this palette especially when comparing it to the price (it retails for $35). The similar predecessor of this palette is Urban Decay's Naked palette, which I also have, and the difference here is that Kat Von D's formula is a lot softer to wear while the colors are vibrant and beautiful, you probably have to use less of this product to get the color you want than of the Urban Decay one. Don't get me wrong, I love them both, but this palette seems a little more practical to me because it has a lot less glitter-specks (only the color '<3' and 'bookworm' have them) and they are very sheer. The palette also comes with her autograph pencil liner in black and this formula is comparable to the Urban Decay 24/7 eyeliner. This palette gets a 95% on my scale and it only doesn't achieve perfection because I wish there were even more colors and the palette was a little larger. However, the packaging is darling, the tin is made of metal and not cardboard like most palettes out there. I do wish that 'Pray For Me' was a little darker when swatched and the camera did not pick up the intensity of '<3' but trust me it really does look like the color you see in the palette.

Korres Wild Rose Compact Powder
I have read stellar reviews on Korres products in general but I've never been drawn to them until I randomly was walking through Sephora and touched this powder out of curiosity. Swatching this item feels like you are running your finger through a cloud. It most certainly is a far cry from MAC's studio-finish powders which are a little harsh to the touch. I don't yet know what kind of coverage this gives, but I tend to use my powder after foundations and this will work perfectly for me. Another bonus is that their 02 Golden Fair color is exactly my skin-tone and I rarely find my exact warmish pinkish hue in any makeup brand. I'm thrilled to try this out, you basically can't even see the powder on my skin in the swatch, but I assure you it is there. I give this product an 80% so far because I have yet to try it and I wish it had a little bit of shimmer in it for an even healthier glow (although I realize it's not practical to wear shimmer everywhere, I'm going to try to impress upon you that we should all always be wearing a bit of shimmer). Also, this didn't rate as high on my scale because I just can't get as excited about a powder as I can about eyeshadows, and the packaging was just bland. It opens up to reveal a little sponge underneath the product, which thoroughly annoyed me, because I thought there was going to be a lot more product (as the case would lead to believe) than there truly is. However, this is one of those products that is healthier than the rest because it is formed without parabens, aluminums and other nasty chemicals we shouldn't be putting on our faces, so I guess beauty and quantity suffer for health. It has a pleasant scent, sheer coverage and reduces shine, all bonuses when it comes to powder compacts. It's also $28 which is not quite as much as some of the other powders on the market.


Tuesday, November 8, 2011

How to Simply do the Perfect Smokey Eye

Following a few simple guidelines, you can create a simple smokey eye and tweak the various steps to create a look that is truly unique and beautiful; truly you.

First you will want to, as always when applying eye makeup, prime your eyelid with concealer or a primer, in my case I used MAC's NC20 concealer to create a flat surface to which the eyeshadow can adhere. Then take your favorite black pencil eyeliner, in my case Urban Decay's 24/7 eyeliner in 'Zero', and draw a line overtop of your lashes. Continue this line and smudge it up over your eyelid and even in the crease. Use a brush to smujdge it out and create this 'smoked' effect, don't worry about being too clean about it, the fabulous thing about a smokey eye is that it's supposed to look uncontrolled and sultry. Make sure to color in between your lashes so you don't have patches of skin that show underneath the smokey eye; fill in your lashes. Then use a black eyeshadow or a dark eyeshadow (in my case it is MAC's 'beauty marked') and apply it liberally over top of the smudged black liner. I suggest that if you have lighter skin like I do, you stick to a darker shade of a color rather than going with black. This is simply because you will have huge contrast between your eye makeup and your skin and might end up looking like a raccoon if you overdo it! That being said, you can truly use any eyeshadow for this as long as you blend, blend, blend it in!!!


The next step consists of taking a shade lighter than the shade used to cover the eyelid and contour the shape of the eye, I used Urban Decay's 'Last Call' eyeshadow also available as 'Queen' from the Alice in Wonderland palette. Accentuate the arch of your eye, this is where you can play with scale and shape and give yourself the desired shape you want. Some people choose to not blend in their shadow here but, as you can see, the color will look very potent and this may not be appropriate for wear during the day or at work. I choose to continue blending it in. I also apply a highlighter, usually just a white eyeshadow or a very light neutral, lighter than my skin-tone. I blend the contour color and the highlighter together thoroughly until no edge can be seen. The final step is an application of liquid liner, I used Stila's liquid liner and some black mascara to give it that polished look. Finally, you can line your waterline (underneath your eye, above your lower lashes) with one of the colors used and apply an eye pencil on top just to make the colors pop. This last part is entirely optional in the look, some people prefer not to do it because their eyes are too sensitive.


I chose to go in a purple/plum direction with this smokey eye look, particularly because purple makes brown eyes pop really nicely as it is a complementary color. However, this same look can be done using any color, or any neutral you'd like, just remember that the base color should be the darkest and anything you apply on the contour should be a shade or two lighter. Experiment with your looks and let me know what creative ideas you've come up with!
Related Posts Plugin for WordPress, Blogger...