Showing posts with label manicure. Show all posts

Wednesday, March 28, 2012

Acid Wash Nail Manicure

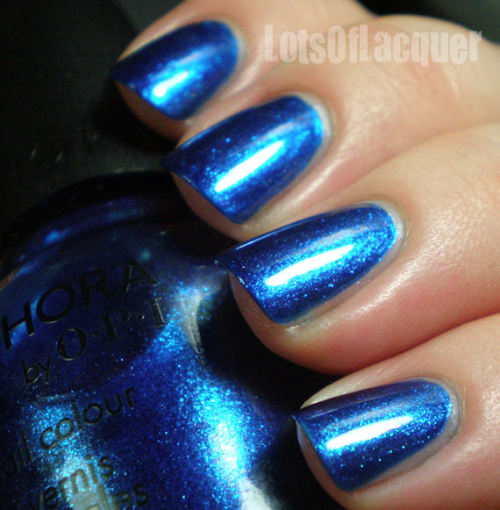
As always, I've been scouring the web looking for cool and interesting nail manicure ideas to show my avid readers and I came across this on Pinterest: the acid wash manicure. It's a really cool effect, the one below is denim-themed and can be done very easily. This isn't a complicated technique like some of the others I have posted about, this is something you don't have to be too fussy with to get it to look right.

All you need to complete this look is a base nail polish color (in this case royal blue) and the color you want to be on top of the 'acid wash' look (in this case white) as well as cotton buds or q-tips and acetone/nail polish remover. The first step is to paint 2-3 coats of your base color and wait to make sure that they are dry and smooth, this requires some patience as some nail polishes do not dry as often as others. Then, after you choose a contrasting color to make the 'acid wash' effect come to life, you should apply just one layer of the top color. After letting it dry thoroughly, soak a cotton bud/q-tip in acetone (but make sure it's not dripping wet, just saturated). If your cotton bud is not saturated enough, it will just smudge and blend the two contrasting colors together, which may make for an interesting effect, but will not allow you to achieve the acid wash manicure. Swipe the cotton bud over your nails, not pressing it down but gently dragging it over so that it removes only parts of the top layer of nail polish (of the contrasting color, white in this example) and leaves your blue intact - this is one of the reasons why you want to apply at least 2 coats of your base color. Finally, as with any manicure, if you want staying power you should place a layer of topcoat to seal your design and smooth out any bumps.


You can achieve really varied looks depending on which colors you choose, remember that when you apply your topcoat, you will stop the acetone from eating through that layer. For example, in the manicure below, you can achieve this design by doing the base in a yellow and then making sure to seal it with a topcoat so that it will not wipe away when you swipe with the cotton bud. Then you want to add a layer of orange polish and a layer of gray nail polish, not sealing these down with topcoat. You can use your acetone to remove parts of the top two layers of polish. As always, seal and protect your design with a final layer of topcoat when you have finished your faux acid washing.

Various colors of nail polish manicures using the acid wash technique
Have fun with this look and happy experimenting! Please post photos of your nails on the blog if you achieve this look!

- Alex

Monday, March 19, 2012

Lace Nail Manicures for Sale!

Since I have been noticing a lot of interest in my posts about lace nail manicures, I've decided to devise a way to get them out to people who want to achieve this look but are incapable of doing it themselves. I found that the easiest way is to create the lace nails on "Nailene So Natural Nails, Real French, 24 ct."   and letting everyone choose their base nail color (although I prefer them on french nails) and lace color. After taking custom orders, it will take about a week to manufacture them (since the fabric and nails have to be bought each time and then they have to be manually crafted with the lace appliques). They do look fabulous and I encourage you to try it by yourself if you feel like you can do it!

This is the posting:
http://www.bonanza.com/listings/Lace-Embellished-Artificial-Nails-Custom-Made-to-Order/63927311

Here are photos of some I did for a quick test-run:


You can find other items for sale at:
http://www.bonanza.com/booths/lethalglam/

Wednesday, February 29, 2012

Comic Book Nails

Lately, perusing the blogosphere and fashion magazines, what has stood out as an awesome new trend is comic book nails! These are highly graphic, colorful manicures not for the feint of heart. If you're down with this look and want to experiment with it, you'd better be ready for lots of compliments and attention from guys and girls alike!

Comic book action bubbles are a simple way to spruce up your nails, using a white base and colored polka dots on top, you can add pizzazz by creating zig-zagged and imperfect speech or action bubbles outlined with a thin-tip black polish. Write your words of choice like 'Splat!', 'BAM!', 'Pow!' and 'Zap!' or whatever other fantastic word you can think of!
Another fabulous way to incorporate this look and to make it look more 'unified', you can use a single-colored background base color and keep your dots in one color as well, such as white. The only thing you would be varying in this version of the manicure is the position of the action and speech bubbles as well as the words you put within them.
If you're into a particular superhero you could do your nails in tribute to them! This lady chose Spiderman and did his mask on her thumb and webs on all the other fingers with a red background and black thin-tipped fine brush nail polish. The spider webs are simple to do, just make semi-circles radiating from your cuticle and then draw the lines straight out from the cuticle to complete you spider web. The mask is a little more complex because you will want to draw the eyes afterwards with white polish and then outline them in black after the polish is all dry.

Another graphic idea is to do a heart on your middle finger with a simple heart-shape and then a cardiogram line drawing on the rest of the nails with a black fine-tipped brushed nail polish. Keep your background color a simple pink or red but make sure that your heart can stick out with a more saturated color.

If you don't want to choose one particular superhero over another one, because you're just such a huge fan of them, take all of the iconic symbols from their outfits and incorporate them in black over different colored base nail polishes. Notice how the background colors are representative of each particular hero, for example, Batman's colors are black and yellow while the Green Lantern's colors are green and black.
Check out my jewelry store website here: http://www.bonanza.com/booths/LethalGlam

Tools you can use to create these looks can be found here:

Thursday, February 16, 2012

Product Review: Salon Express Nail Art Stamping Kit

I recently purchased this nail art stamping kit from Salon Express at the Rite Aid (you should be able to find it in many drugstores) in the 'As Seen on TV' section. I was intrigued by it because it seemed simple enough to use so that I could achieve salon-quality manicures without  paying a whole lot. The whole kit should cost you about $8-$10, so for that price I considered that it would be worth a try.

The kit comes with the following items:
5 metal stamping plates with various designs (as seen in the picture below)
1 stamper
1 scraper
1 stamping plate base


This kit is fairly simple to use if you read how to do it or watch a youtube video on how it's used, but it's also pretty self-evident. You place a metal stamping plate of your choice (whichever one has a design you like and want to use) onto the stamping plate base. Then you take a nail polish (preferably opaque so it shows up better) of thicker consistency and place it on top of the design stencil stamping plate. Then you take the scraper and run the blade over the design to wipe away any excess polish. Finally, using the stamper you want to quickly pick up the design from the stamping plate by pressing it pretty thoroughly onto the design and then rolling it onto your finger nail to transfer the design.

This is a fairly simple tool to use but it can be time-consuming so if you like to spend time on intricate nail designs, this is the cheapo product for you, but if not, don't bother investing in it. However, if you are really into perfect, precise looking nail designs, you may want to invest in a better set, such as the one Konad makes. Some of the designs on the stamping plates are really thin and over-complicated and will not show up on your nails because they do not transfer properly. You also cannot use glitter nail polish for the designs or anything that isn't very opaque and in stark contrast to your base coat of nail polish because the designs won't show up at all or appear smudged. With these drawbacks in mind, I still really like this product because it is very inexpensive and with a little effort you can have really cool designs that are sure to stand out! This was my first attempt at using the stamper with their cheetah print design. I was happy with the results.

Tuesday, January 10, 2012

Urban Outfitters Sale Purchases

Since Christmastime is over and all the holiday sales have begun, it's a good time to go looking for awesome deals! All Christmas-candles that were previously $18 at Urban Outfitters are now $4.99!! I purchased one that smells like Christmas trees and I love it! I might get even more if they have one of those 50% off sale item days. Unfortunately, it appears as though the candles are still a whopping $10 online so you'll have to go in stores to find this deal. On top of that I got two pairs of stockings for $20 (but they're really nice ones and good quality to boot). Then, I saw some fun things that really caught my eye that I wouldn't have otherwise purchased... a glitter set that was originally  $18 that I purchased for $4.99 and a glow-in-the-dark nail polish set with a silver crackle nail polish which was also the same price.

At their original prices of around $20, I never would have purchased these, but this little glitter set is very useful for manicures and makeup or can be dusted all over your body for a fun look (you can even spread it on with your body lotion!). There's absolutely so many options for these fun things I've purchased but I don't see them online to show you the sale.  You probably have to go in stores for these great end-of-the-line bargain prices. I've never had glow-in-the-dark nail polish so I'll have to get back to you guys on how this works or if it does at all!

Glitter set

Glow-in-the-dark Nail polish and Silver crackle polish


Monday, January 9, 2012

Lace nail art design


Are you looking for a fun and easy interesting nail trend to keep you away from the hum-drum same styles you're used to doing all the time? This is a simple and fun look involving lace that you can purchase anywhere (even at the dollar store). I stumbled upon this look and was absolutely shocked at how breath-taking these nails can look for how little effort it requires. What do you think about this look? You can choose to do the lace all over your nails, on fake or real nails, or you can choose to just do portions of lace randomly placed on your nails. I personally am a fan of the unique nails, each nail looking like a different lace portion of the same pattern, whichever piece strikes my fancy on each finger.

What you'll need:
- Base coat (any color you choose)
- Top coat (clear nail polish)
- Small-patterned lace (so it fits over your nails, honeycomb pattern is simplest to work with) in any color
- Small nail scissors
- Nail art pen (if you choose to draw more designs like swirls or dots over your lace to add intricacy)


This is actually a very simple process to do. First, you will want to cut out the portions of lace you want to use and measure them up with your fingernails. Once you've gotten all the pieces cut out (or you can go one by one if you choose), you want to apply a base coat (it can be clear nail polish or nude/colored opaque, you may even want to consider glitter polish if you're going somewhere fancy). This look doesn't require any extra glitz and glamour, however, because the lace will present so well on its own. After you apply your base coat, wait until it's dry and apply a clear coat of nail polish generously over top, gently use a tweezer and position your lace on top of the clear coat before it dries. This is important because you want the lace to tack onto your nail by sticking to that clear coat very well. After everything is dry, soak it up one more time with another clear coat of polish over top so that your lace won't frill or come off during hand-washing or rigorous activities! If you want your nails to be even more interesting,  you can draw on borders, swirls or dots (even cheetah prints with little 'c' shapes) with nail art pens. Remember to be creative and use different colors of lace, nail polish, and nail crystals over top to keep your nails looking very cool! Your friends will envy you for your expensive-looking manicure; you don't have to tell them you did it yourself!


Friday, January 6, 2012

Sephora OPI Sale!!!

This post is for all of you gourmet nail polish lovers that refuse to coat your nails with anything but the best! If you go to Sephora's website, you can just click this link to easily get into the sale portion of their website. I didn't see a button or link for it anywhere on their main page so I got it using Google, it was a trick someone taught me from a makeup board. You can choose to sort all of their items on sale by price, which will show you everything from the cheapest price to the most expensive.

Now before you get too excited, there is something important to realize: not all of the colors go on sale, it's mainly just the seasonal ones. However, they're full-sized bottles and it's still a great deal, so if you can find a few that you like, it's worth it! Here's a list of the colors that have been reduced in price from approx. $10 to $5 or $6.65 here and the link you can find them at. I've also included photos from fellow bloggers, thank-you for your contributions to this article!

Countdown to the Kiss: opaque royal blue with medium glitter (item # 1355981) ---> $5


Don't be Eggnogious: clear with medium and chunky copper glitter (item # 1355999) ---> $5


New Years Red-Solution: opaque metallic golden red (item # 1356013) ---> $5


Stop Stocking Me: opaque metallic golden plum (item # 1356039) ---> $5


Tempted by Teal: opaque metallic teal (item # 1345132) ---> $6.65


Going Nude, Eh?: opaque light milky neutral (item # 1256973) ---> $5


Blasted Nail Colors : blasted effect opaque metallic sapphire blue, midnight blue, maraschino red, metallic turquoise, and bright white ---> $5

I couldn't find any great photos of this collection per se but this is what crackle nailpolish looks like, the 'blasted' is supposed to be a slightly milder effect, but it probably looks the same.

From the Katy Perry Crackle Nail Collection by OPI

Friday, November 18, 2011

Water-Marbled Nails

Finished design from this tutorial
Do you want to achieve salon-grade manicures at home with interesting designs but you're not very artistic? Well, I have the solution for you. Don't bother spending your money on magnetic nail polishes or nail polish strips, you can learn to do this right at home without having to go out and purchase anything.


Tools for this project
What you'll need:
  • Q-tips
  • Toothpicks
  • Nail polish colors (at least 2, must not be fast-drying)
  • Top-coat (can be fast-drying)
  • Nail polish remover 
  • Nails (real or fake will do)
  • Tape (any kind really)
  • A disposable cup
  • Room temperature water
  • Paper towels

You will want to prep your nails before you do anything else and make sure they are well cleaned, and apply a coat of nude colored nail polish so that the variation in color in your own nails does not affect the water-design and show through. Then you will want to set up your work space by placing down a paper towel to cover the table you're working on so you don't get it all dirty. Fill your disposable cup about three quarters of the way up with room temperature water (you can use filtered or tap water, some people say filtered water is better because there will be less bubbles in it). It is important that you use room temperature water because hot water will cause the polish to spread too fast and cold water won't let it spread enough. Place tape around your nail and on your fingertips so that you don't get your fingers all messy and have to go back with tons of acetone to clean them off. This step is a definite time-saver, although it may not seem so at the beginning.

Open your nail polishes up because time is of the essence when you are doing this, this doesn't mean rush, be meticulous but quick. Carefully place a drop of nail polish in the water and then place the next color inside the middle of the previous color. Do this over and over until you have your desired bulls-eye of colors.

Then use your toothpick to swirl the polish or drag it in and out to create a pattern. My personal favorite is starting from the second line and dragging it into the middle, but make sure you do not pull up, push the toothpick into the middle so that the nail polish does not separate. Wipe your toothpick clean after each swipe with the toothpick because the colors will stay on it and affect your design in a not-so-pretty way when you place it back in.


Place your fingernail down into the water wherever you think the design looks nicest. You can even put all of your fingers in at once if you want a random-looking swirl on each finger. Do not lift your fingers out of the water immediately. You will want to leave your fingers in the water and wait about 30 seconds until you take a q-tip and clean out the excess polish in the water (around your fingers). This will clear away any potential polish like a thin skin so that it does not affect your beautifully designed nails. Then you can lift up your nails. Wait a little while for them to dry and then remove the tape from around your fingers carefully so that you do not smudge anything. Use a q-tip dabbed in nail polish remover to clean up the sides of your nails and your cuticles of any nail polish. Repeat this process with all of your nails.
Before removing the tape
After removing the tape


Apply a topcoat as the final step to stabilize your design and make it glossy and this will also help to get rid of any excess water bubbles floating on the surface of your nail. You can make all kinds of designs with this technique, I only experimented with two nails so far but I've seen some beautiful designs on Google!

Related Posts Plugin for WordPress, Blogger...