Showing posts with label do it yourself. Show all posts

Thursday, February 23, 2012

Sponge Manicure Nail Tutorial

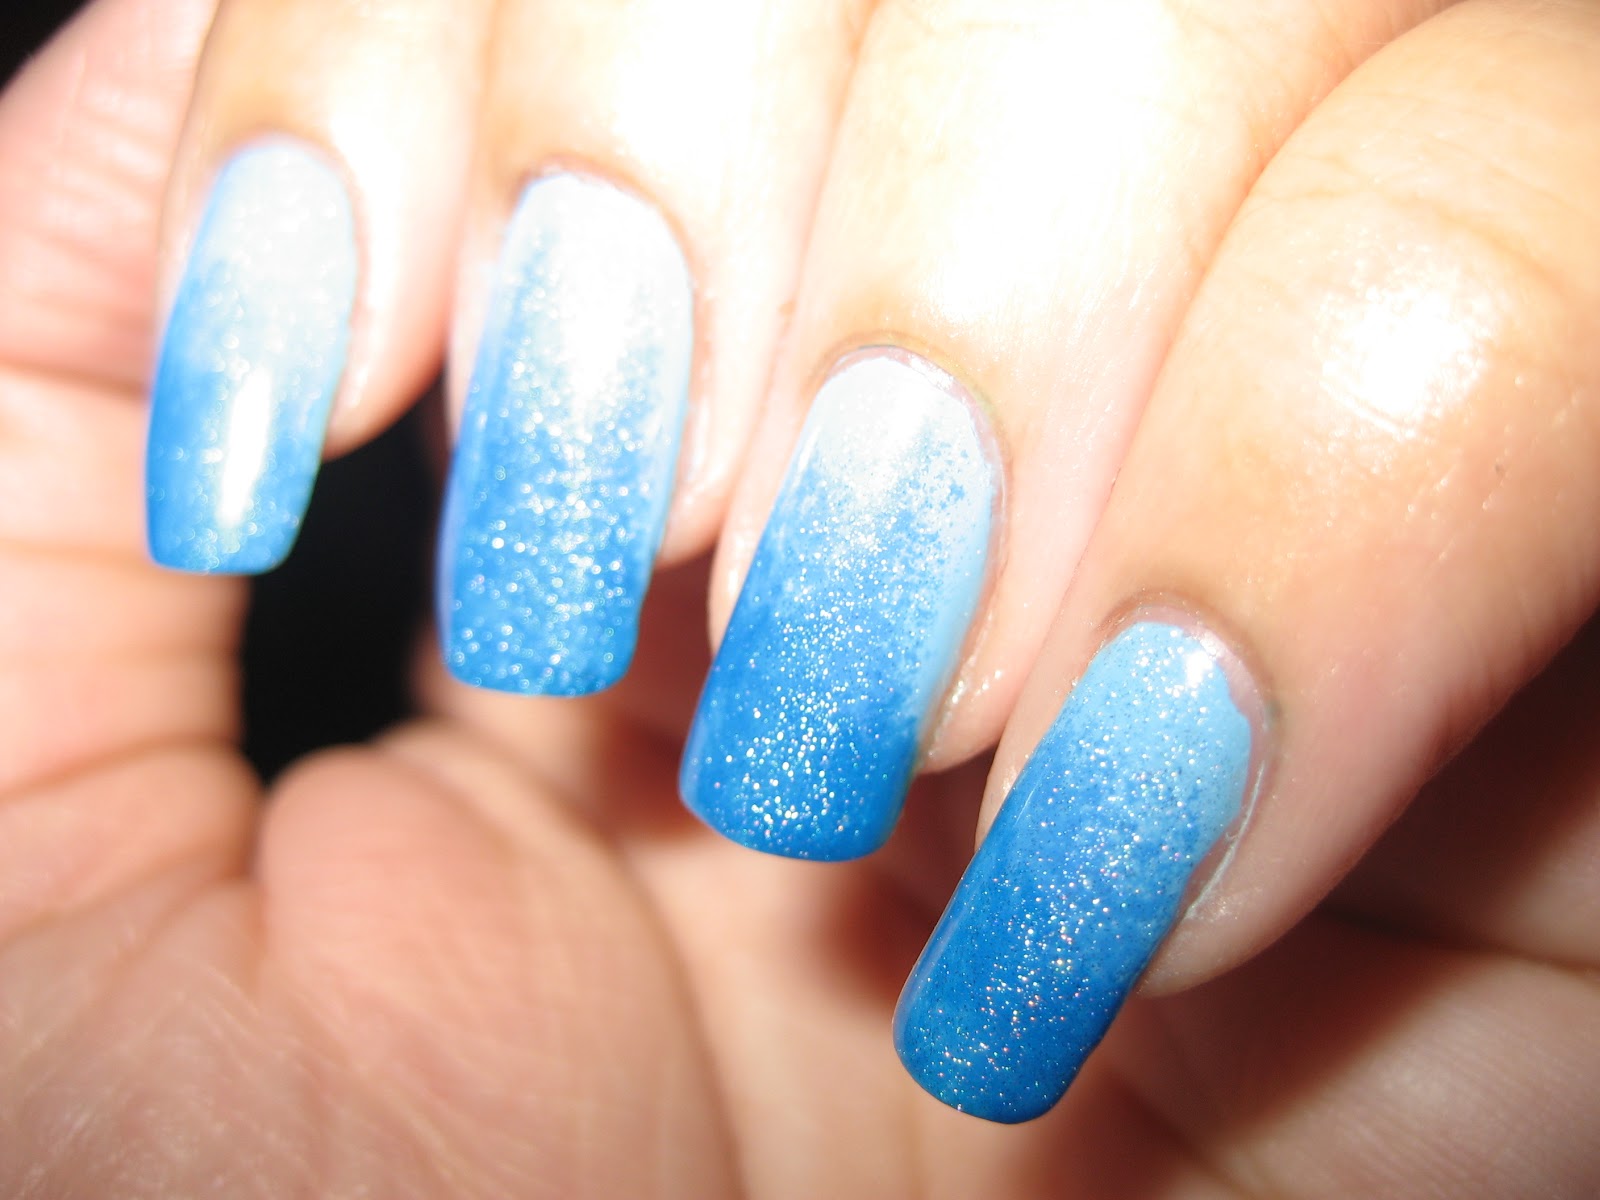
This is the look the tutorial will give you, apply a final coat of fine clear glitter if you do not want a matte finish
Sponge manicures are increasingly popular and easy do-it-at-home-yourself projects. You can create a myriad of various color and shape combinations to create the most interesting manicures you've ever seen. This is not a manicure for those who are all about perfection because the randomness is what creates beauty in this type of look. So if you like speckles and soft blends of colors as well as gradients, this is the manicure for you!

What you'll need:
- Base coat
- Base color
- Paper towels
- Sponge (either art sponges or makeup sponges)
- Tweezers
- Nail polish colors of your choice - one bottom color, and one intermediate color between base color and tip color
- Top coat
- Glitter (optional)
- Acetone
- Q-tips

I suggest first trying this look with a white base color as any other accent color will look vastly different compared to the white coat and you can easily see what you are doing with the sponge, allowing you better control of your technique. Make sure not to buff your nails, because you want them to be slightly gritty for this manicure because if the nail is porous, instead of smooth and shiny, you will have an easier time applying your color. Make sure that before you start anything, you lay down a paper towel so you don't ruin the desk you're working on with polish. First, apply your bast coat of nail polish and let it thoroughly dry. Then, apply your base color (white in my case) and make sure to concentrate it on the lower third of your nail near the cuticle but lightly coat the entire nail. You will not need more than one coat of this base color.

You can then apply an intermediate color on the middle third of your nail (if you chose to go with blue as the tip color then you would want to pick something like a lighter baby blue to make it look like a gradient going from white to blue). Make sure to apply this intermediate color to the middle third of your nail using a sponge portion that you have ripped off an art or makeup sponge and holding it gently with your tweezers. Make sure not to over-saturate the sponge with polish, it may be a good idea for you to wipe any excess polish onto a paper towel before applying it to your nail. In the sponge manicure, less is more, you want to build it up rather than have to take away polish (which usually will result in having to start the manicure over again).

Then, to apply your tip color, which should be the darkest of the colors you have chosen, for example a fully saturated blue or one with glitter in it, you should use another sponge after your previous coats have completely dried. You don't want to apply the colors while the previous application is still wet because they will muddle together and the stickiness of the previous coat will ruin the manicure. If you find that your gradient is not sufficient, you can go back in with the sponge and dip it alternating in both colors to go over the line where the colors meet to improve the gradient. Let everything dry and apply a top coat, especially if you've chosen a glitter nail polish to add to the tips so that the glitter doesn't move and to make your nails appear shiny as well as for staying power. Use some acetone and q-tips to clean up around the sides of your nail if you have gotten nail polish on your fingers.
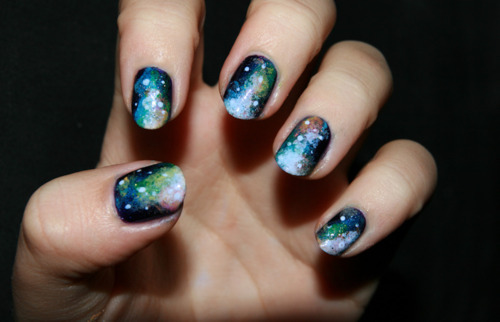
Starting with a blue base and finishing with a green tip, covering with green glitter will give you this look
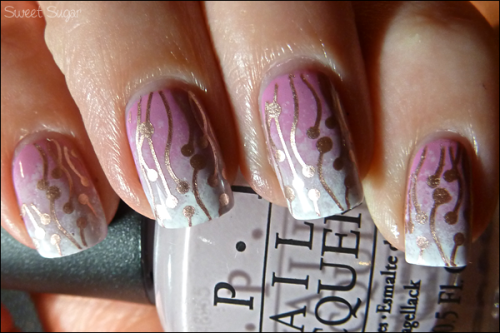
Starting with a pink/mauve base and princess pink in the middle and finishing with a white tip you can get this look by adding bronze colored lines with circular tips using a toothpick or fine-tipped brush
Starting with a red base, orange middle and yellow tip, and drawing on palm tree silhouettes with black will give you this


If you're interested in purchasing a kit to get you started, Konad makes a wonderful one that you can purchase here (btw this is a great deal because these usually sell for around $20):


Thursday, February 16, 2012

Give Yourself Galaxy Nails


If you're like me and you need something to put on your nails so you don't bite them or pick at them or just to plain strengthen them and you're sick of the same old nail polish colors in your collection, spruce up your nails with this new galaxy look! 

This nail polish application looks like it would be really difficult, right? Well, it's not, and all you need is: a pair of tweezers, a makeup sponge, toothpicks, and nail polish colors (I suggest black, navy/dark blue, rosy pink, yellow, and white).

First, apply a coat of black nail polish to your nails and let it dry. Secondly, you'll want to get the makeup sponge and rip a small piece off of it and pick it up with your tweezers and dip the sponge in white nail polish. Make sure you only use very little polish when you do this or it will look blotchy and apply in a nebula-like line or constellation over your nail, leaving some black showing on the sides. Sponge some yellow nail polish in the middle of the 'white nebula'. Next, sponge on some rosy pink polish, keeping it near the yellow you have already added to get a multi-dimensional effect. Finally, sponge on some navy or dark blue polish around the edges of the nebula so that you can create a gradient effect or fade it into the black background. You can always clean up around your nails with nail polish remover if you need.

If you use a toothpick and dab it into the white nail polish and then quickly draw little stars around your nails,  you will achieve small constellations of stars around your nebula. Dot around the nebula as you can't see as many stars inside the nebula. At the end, you can add a few larger stars. Use fine glitter polish to create even smaller stars but make sure that the glitter will  not overpower your design or completely mask it. This layer should be fairly thin! Then add a topcoat for staying power and you're done with your fabulous galaxy nails design!

You can use other colors such as orange, green and purple to your design, just make sure you keep it cohesive and you do the same thing on all of your nails so they look like a set!  Good luck and have fun experimenting with outrageous galactic nails

Tuesday, January 10, 2012

DIY: Make Your Own Gold Glitter Clutch

DIY: Gold Glitter Clutch


ASOS oversized clutch bag
¥150 - asos.com

Jimmy Choo mesh handbag
$1,150 - mytheresa.com

Anya Hindmarch glitter handbag
$578 - my-wardrobe.com

Jimmy Choo metallic clutch
$595 - net-a-porter.com

Anya Hindmarch clutch bag
$578 - my-wardrobe.com

Amazon.com: Martha Stewart Large Glitter Florentine Gold: Arts, Crafts...
$18 - amazon.com


You can use any foam paint brushes from hardware stores, any clutch you have laying around the home that you're sick of and want to spruce up and don't be afraid to try different kinds of glitter. When choosing glitter, make sure you choose finely milled glitter as opposed to large milled glitter because it will look classier and be easier to manage as well as less lumpy. 

Related Posts Plugin for WordPress, Blogger...